2026 Latest Guide: Teach You to Build Rainyun Auto Check-in for $0, Get Daily Points for Renewal (Step-by-Step Tutorial)
As we all know, checking in on Rainyun earns points, and points can be exchanged for hosting. However, manually checking in every day is too troublesome, and buying a server to run a script feels like 'using a sledgehammer to crack a nut' (and the points earned might not even cover the server cost 😂).
Today, I'll teach you a completely free, serverless, fully automatic solution — using GitHub Actions to achieve daily automatic check-ins!
Why Use GitHub Actions for Rainyun Auto Check-in?
| Solution | Cost | Difficulty | Stability |
|---|---|---|---|
| Local PC Idle | High Electricity Bill | Low | Gone when powered off |
| Buy VPS to Idle | Tens of RMB/month | Medium | High |
| Buy Idle Host/Virtual Host | A few RMB/month | Medium | Medium |
| GitHub Actions | $0 (Permanently Free) | Low | Extremely High |
Yes, you read that right. Using the free CI/CD resources provided by GitHub, we can schedule a server daily to run our script for free, burning after use, without spending a penny!
GitHub Actions offers unlimited free usage for public repositories, sufficient to support such scripts. However, the free policy may change with platform rules. Please use it reasonably and comply with GitHub's Terms of Service.
What are the Highlights of the Rainyun-Qiandao Script?
This script (Rainyun-Qiandao) is deeply optimized for Actions:
- Auto Captcha Bypass: Built-in Selenium + ddddocr, automatically recognizes sliding/text captchas. Want to know how the captcha is automatically cracked? 👉 How to Crack Rainyun Check-in Captcha? 2026 Latest Auto-Recognition Solution
- Cookie Persistence: Uses Actions Cache to store login credentials, avoiding daily re-login and risk control.
- Multi-channel Notifications: Supports WeChat (PushPlus/WXPusher), DingTalk, and email push for check-in results.
- Headless Mode: Specifically adapted for Linux server environments, low memory usage.
- Failure Retry: Network fluctuation? Captcha failed? Automatically retries until success!
- Account Browser Fingerprint: Each account has a slightly different browser fingerprint, reducing the risk of detection to some extent.
How to Deploy the Rainyun Check-in Script? (Three-Step Tutorial)
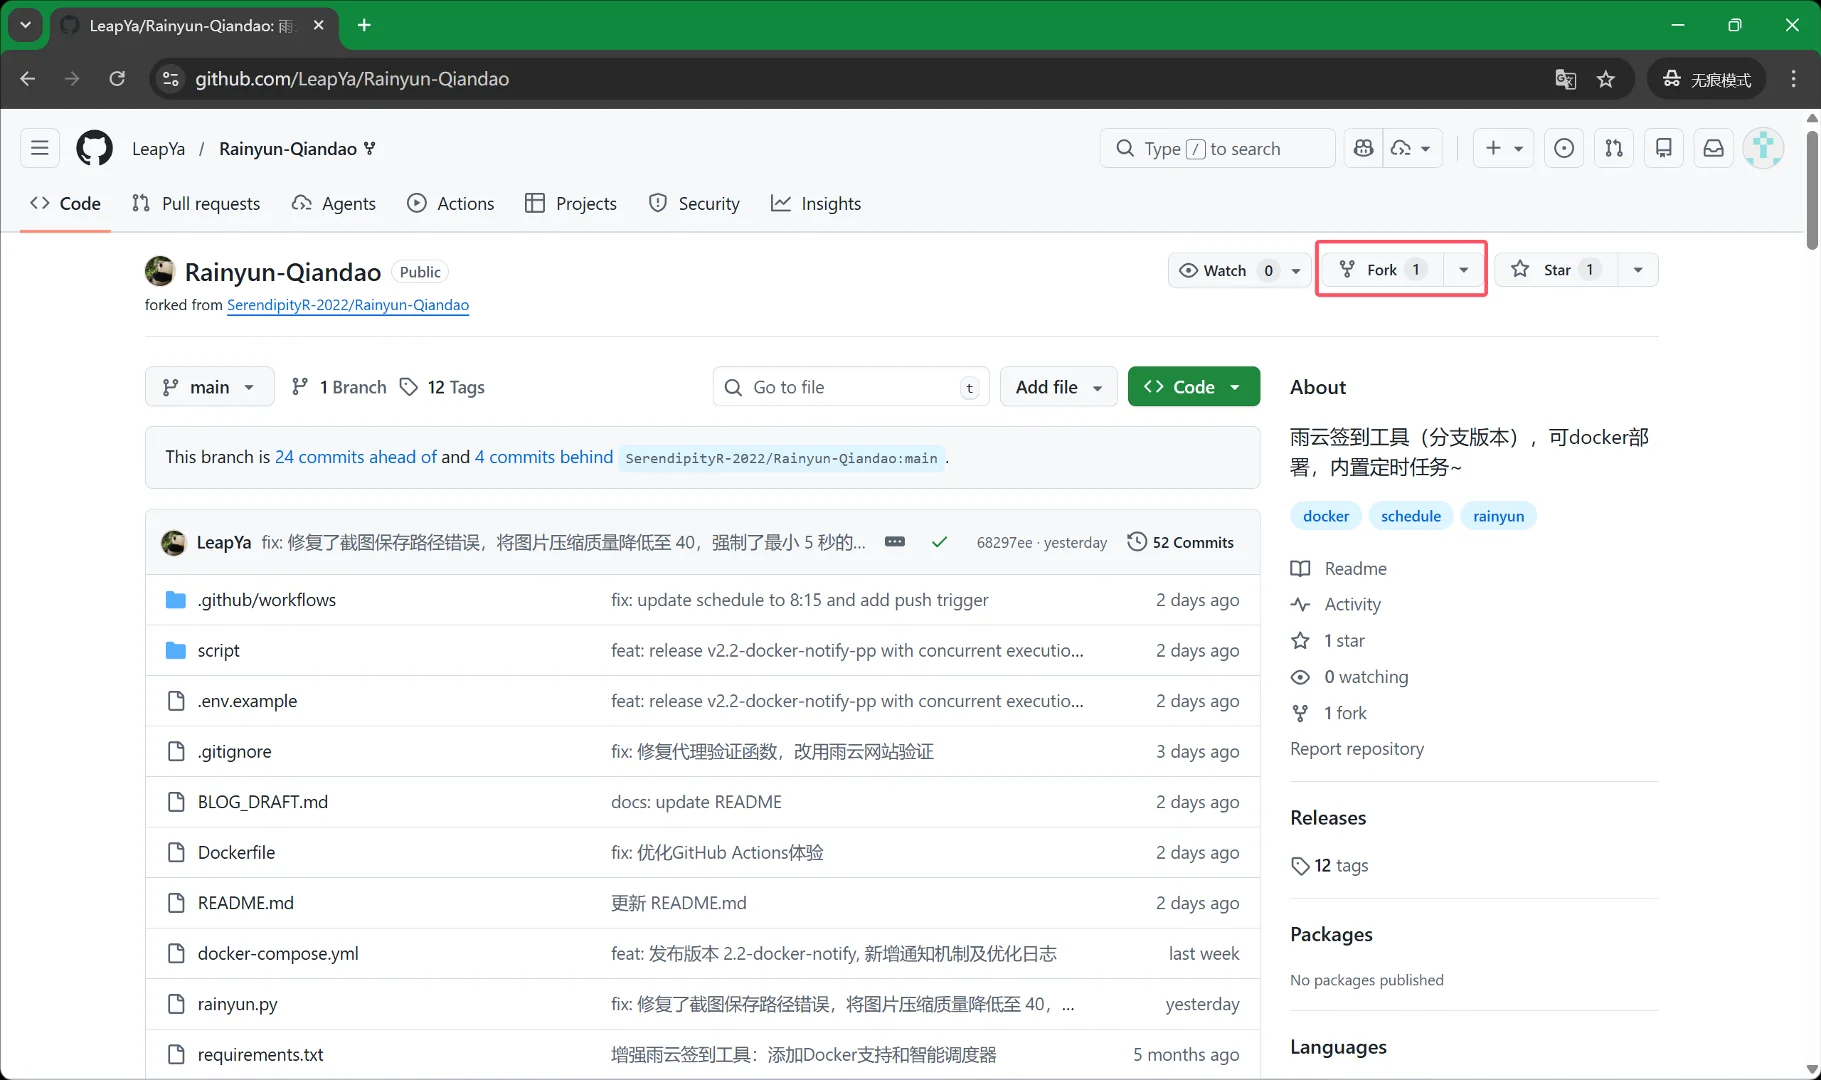
Step 1: Fork the Project
Visit the project repository: https://github.com/LeapYa/Rainyun-Qiandao
Click the Fork button in the upper right corner to clone the project under your own account.

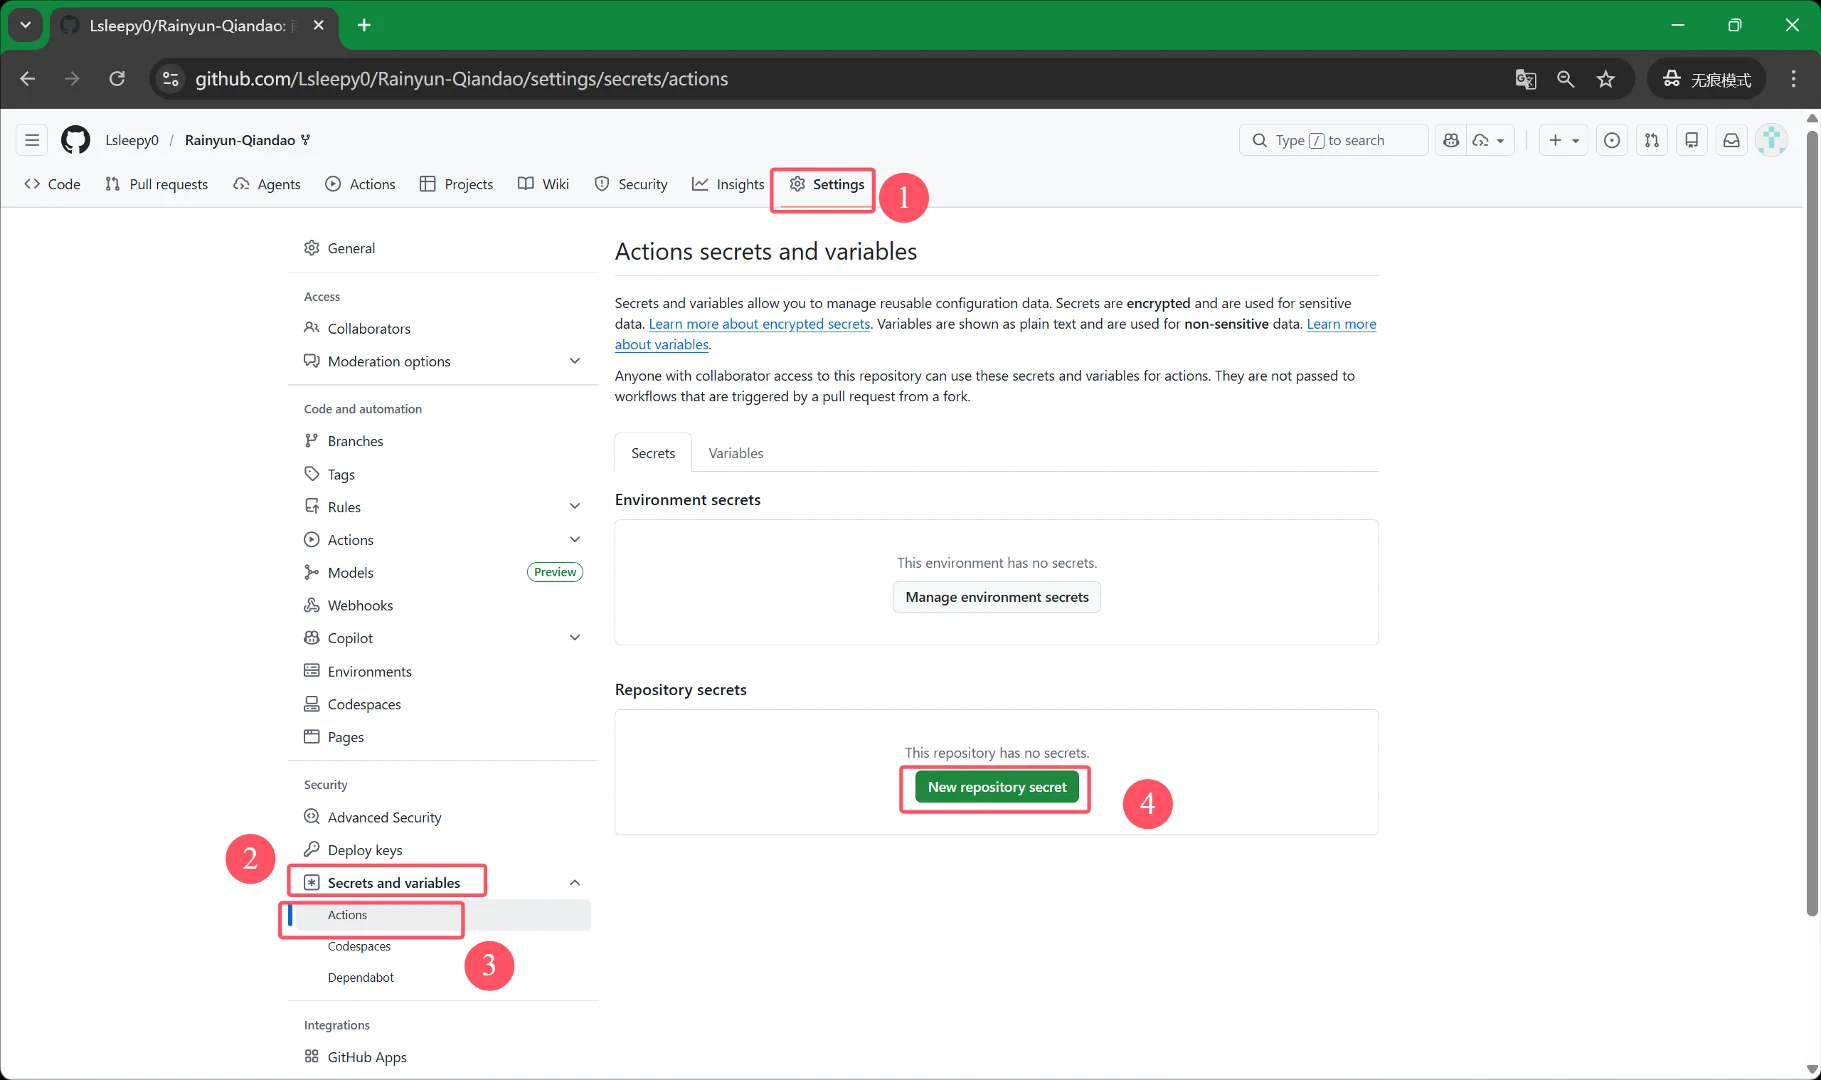
Step 2: Configure Account and Password
On your repository page, click Settings -> Secrets and variables -> Actions -> New repository secret. Add the following Secrets one by one. Note that GitHub can only add one Secret at a time, requiring multiple clicks of the New repository secret button. This step requires patience.
1. Rainyun Account Password (Required)
RAINYUN_USERNAME: Your Rainyun account(s) (separate multiple accounts with|)RAINYUN_PASSWORD: Your Rainyun password(s) (separate multiple accounts with|)
2. Message Push Configuration (Choose one or more)
- PushPlus Push
PUSHPLUS_TOKEN: Get it at: pushplus.plus
- WXPusher Push (Recommended: Supports HTML format, best experience)
WXPUSHER_APP_TOKEN: The App Token of the application.WXPUSHER_UIDS: Single or multiple receiver UIDs (separated by,).WXPUSHER_TOPIC_IDS: Topic ID(s) (separated by,), everyone following the topic can receive broadcasts, suitable for group sharing.
- DingTalk Robot Push
DINGTALK_ACCESS_TOKEN/DINGTALK_SECRET: Access Token and Signing Secret from the robot settings.
- Email (SMTP) Push
SMTP_HOST/PORT/USER/PASS: SMTP server configuration (authorization code).SMTP_TO: Email to receive results. [Optimization] Email notifications will include all check-in screenshots by default, even if normal mode is configured.
3. Advanced Features & Screenshot Control (Optional)
SCREENSHOT_MODE: Controls whether screenshots are included in reports:all: Generate and embed screenshots for all accounts (highest data usage).failed_only: (Recommended by default) Embed screenshots only when check-in fails, send text only on success, maximally saving data.none: No screenshots in the entire report.
MAX_DELAY: Maximum delay for staggered start of multiple accounts (unit: seconds).MAX_WORKERS: Maximum concurrent thread count, can be increased for many accounts.
4. Extended Feature Configuration (Optional)
PROXY_API_URL: Proxy IP API, enables using a different IP for each account's check-in, essential for anti-blocking.TINYPNG_API_KEY: TinyPNG compression Key, used for extreme compression of generated HTML screenshot size to prevent exceeding character limits of push platforms (this project has built-in four-level graceful degradation logic and runs robustly without it).
Step 3: Enable the Action
- Click the
Actionstab. - You will see a green button "I understand my workflows, go ahead and enable them", click it.
- On the left, select "Rainyun Daily Check-in", be careful not to mistakenly click "Rainyun Test Account Check-in".
- You will see a yellow warning banner: "This scheduled workflow is disabled because scheduled workflows are disabled by default in forks." Click the
Enable workflowbutton next to the banner. - Then click
Run workflowon the right to test manually once.
🎉 All done!
From now on, every morning at 8:15 (Beijing Time), GitHub will automatically dispatch a server to check in for you and push the results to your phone!
Note: As GitHub officially states, scheduled workflows cannot guarantee execution time. The actual run time may be delayed by 0-3 hours from the set time. This is normal, does not affect check-in success rate, just wait patiently.
📖 Further Reading: Curious about how the captcha is automatically handled? Read this 👉 How to Crack Rainyun Check-in Captcha? 2026 Latest Auto-Recognition Solution
Finally:
Since you're getting this for free, don't forget to give the original author's repository a Star ⭐!
Repository address: https://github.com/LeapYa/Rainyun-Qiandao
🚨 Legal Risk Notice: The automated check-in behavior involved in this tutorial may violate Rainyun's "User Agreement" and related service terms, carrying risks such as account suspension and point reset. Such technical solutions belong to a gray area and are provided solely for learning the principles of GitHub Actions automation technology. Do not use them in production environments or for large-scale commercial purposes. Use implies that you have fully assessed the risks and voluntarily bear the consequences.